Introduction:
Azure SQL Database is a cloud-based relational database service from Microsoft. In this article, I will share following
- How to create an azure database and server.
- Configure Azure SQL Server firewall
- Connect to Azure SQL Database via SQL Server Management Studio (SSMS)
- Connect to Azure SQL Database via Visual Studio Server Object Explore
Prerequisites:
- Create a free trial azure subscription from Azure portal https://azure.microsoft.com/en-in/free/
- Install SQL Server management studio from here https://msdn.microsoft.com/library/mt238290.aspx
- If SSDI not installed in VS, Install SSDI from Visual Studio
- In Visual Studio menu click on Tools > Extensions and Updates > Select Updates/Install > Microsoft SQL Server Update for database tooling
Create Azure Database:

Step 1:
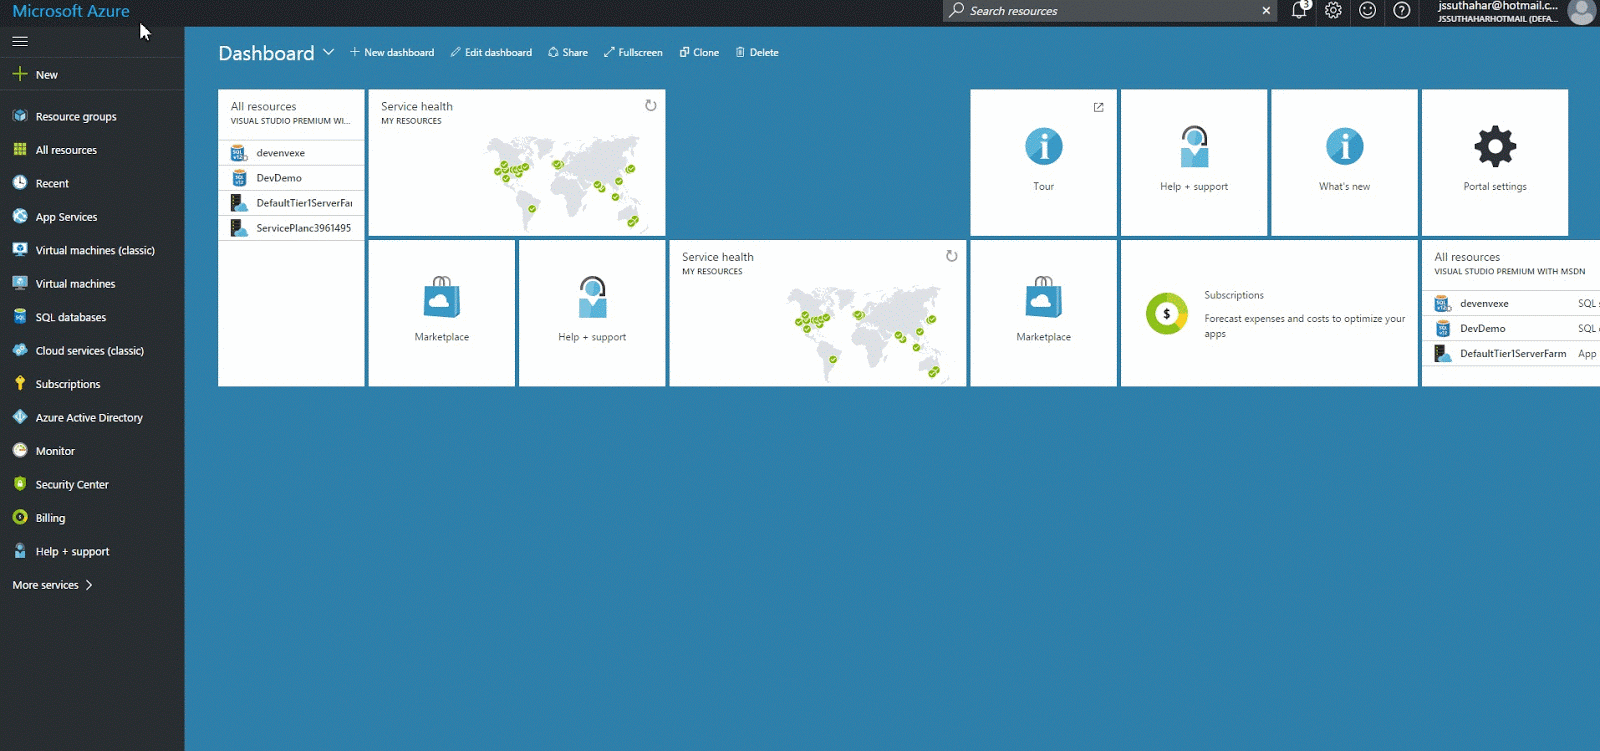
Logon to the Azure portal https://portal.azure.com with your registered azure Microsoft account.
Step 2:
Click on SQL Database Symbol > Click on + Add button for create new database

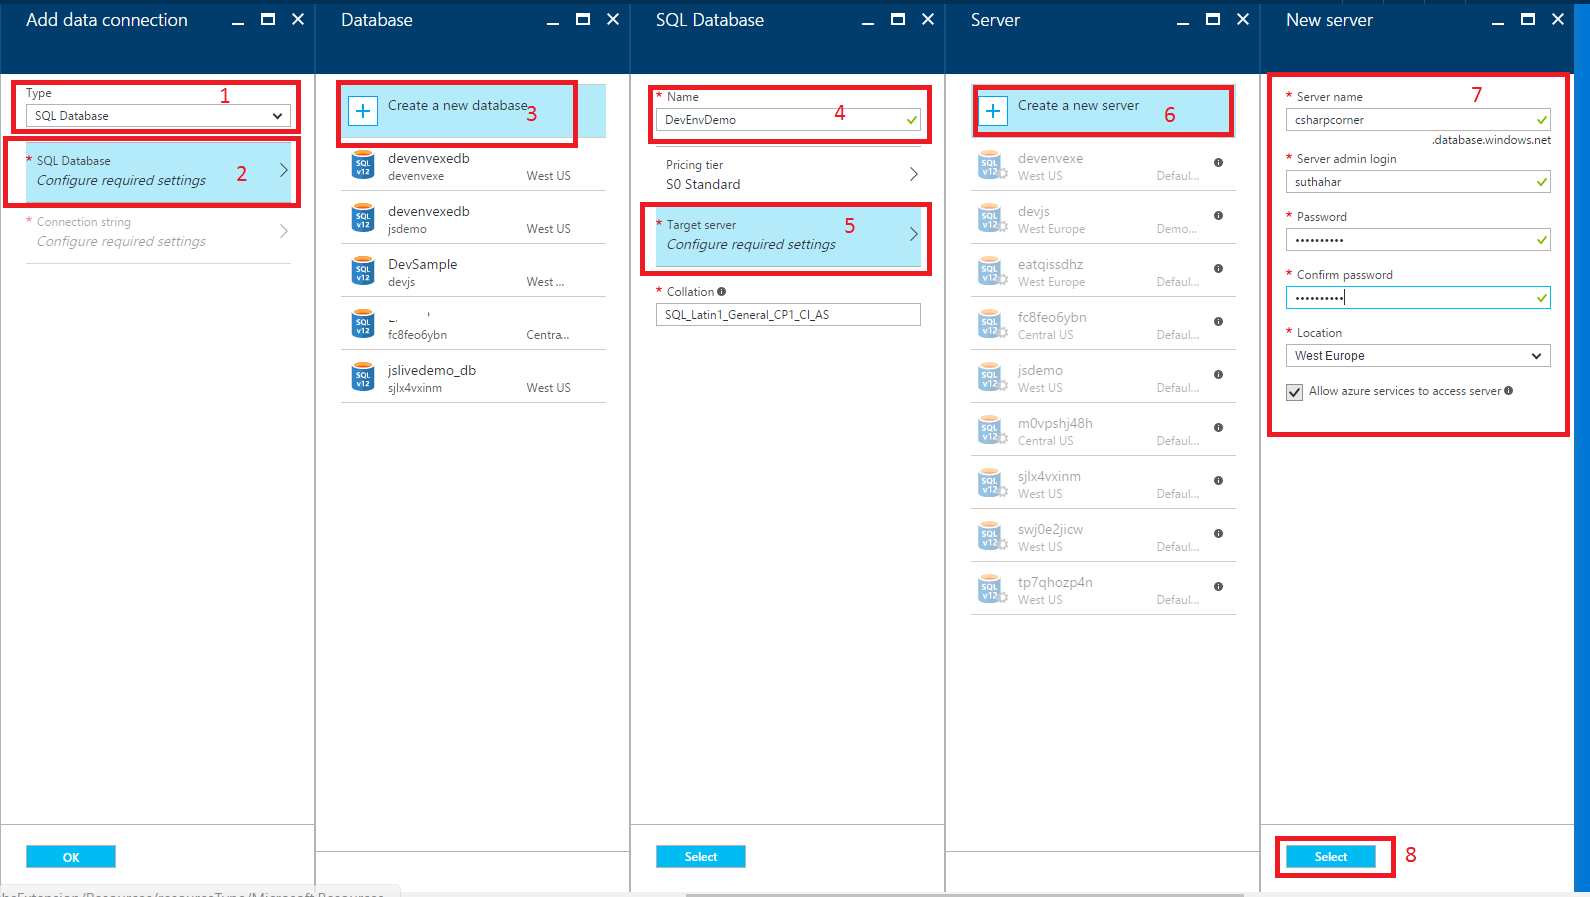
Step 3:
Provide Database name, Select Subscription name, you need to create resource group before create SQL server and Click on Server it will navigate to Sql Server page

Create Azure SQL Server:

Click on “+ create a new Server” > provide Server name, username, password and server location and click on Okay
Configure Azure SQL Server firewall
Azure SQL Database uses firewall rules to allow connections to your servers and databases so if you want to use Azure database into local machine. Need to add local IP address into Azure Database Firewall.
Step 1: Local machine IP Address
Open Run > type CMD > type ipconfig and get local machine ip address

Alternately you can open any browser > open google and type “what is my ip address”.

Step 2: Configure SQL Azure Firewall
Click on All Resources > Select Newly Created Database Server > Search “Firewall” and select Firewall > add your local computer ip address as per below.

Connect Azure Database and Server Via Local SQL Server Management Studio(SSMS):

SQL Server Management Studio (SSMS) is an integrated environment for accessing, configuring, managing the database like insert, update, delete. I have shown below steps for how to connect azure database to SSMS.
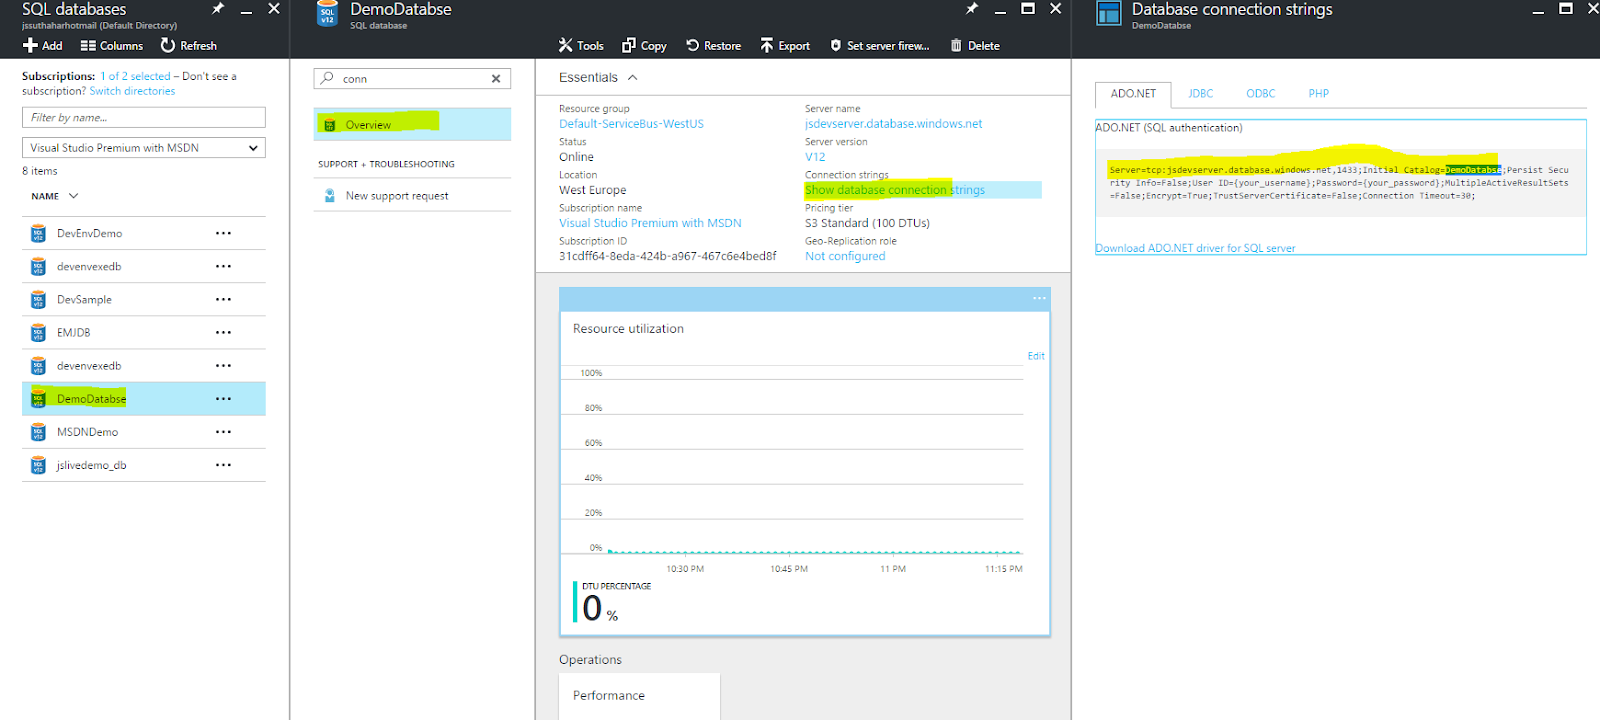
Step 1: Get Connection Details:
If you already noted Server details and login details, no need to do this step.
Click SQL Database > Select Database name > Search or Select Overview > Click on Connection String>Copy Server and database details
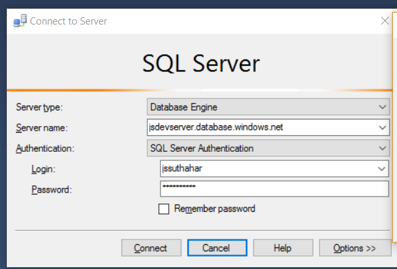
Step 2: Connect Database:
In Windows Start Page, type SQL Server Management Studio and the program will appear. Click the program to open SSMS. You might want to right-click the program and pin it to the Start Page. Alternately from the Run dialog box, type SSMS.exe and then click OK.
Provide server details and login details
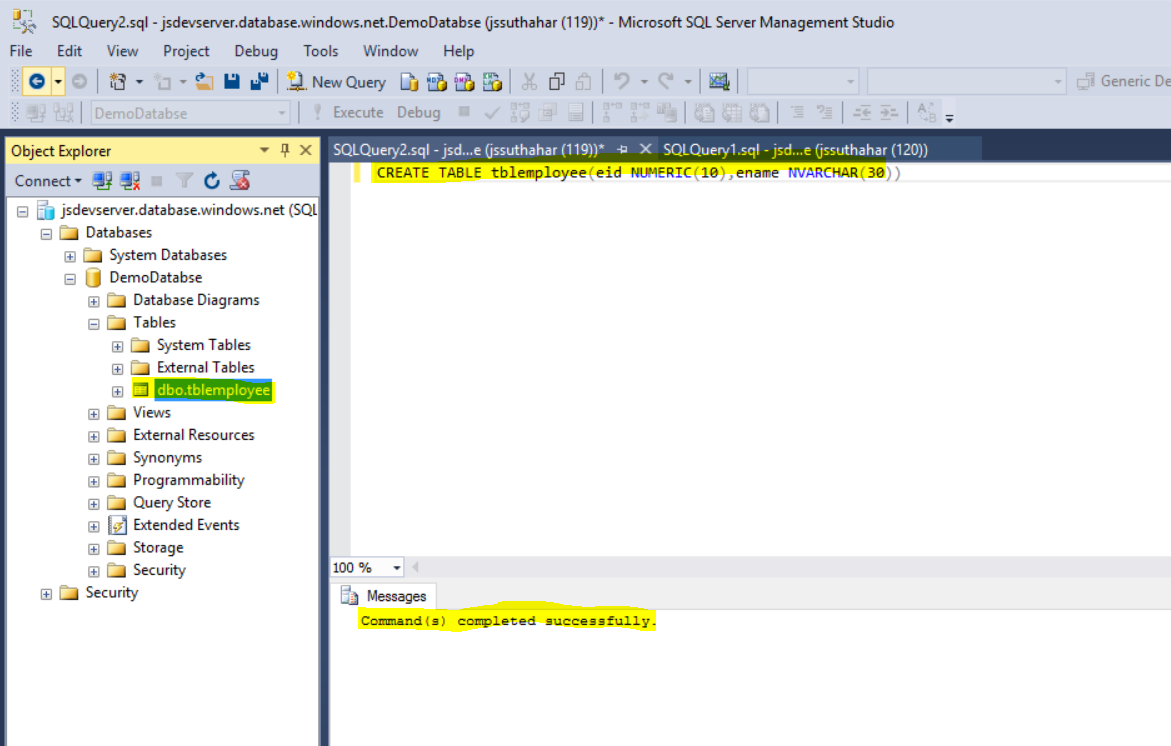
Step 3: SQL Server Management Studio
After successfully login to SSMS, all the database loaded into the IDE like below

Step 4: Open Query Window (Ctrl +N)
You can open new query window using menu icon or press Ctrl+N > type SQL query >Press F5 for execute query
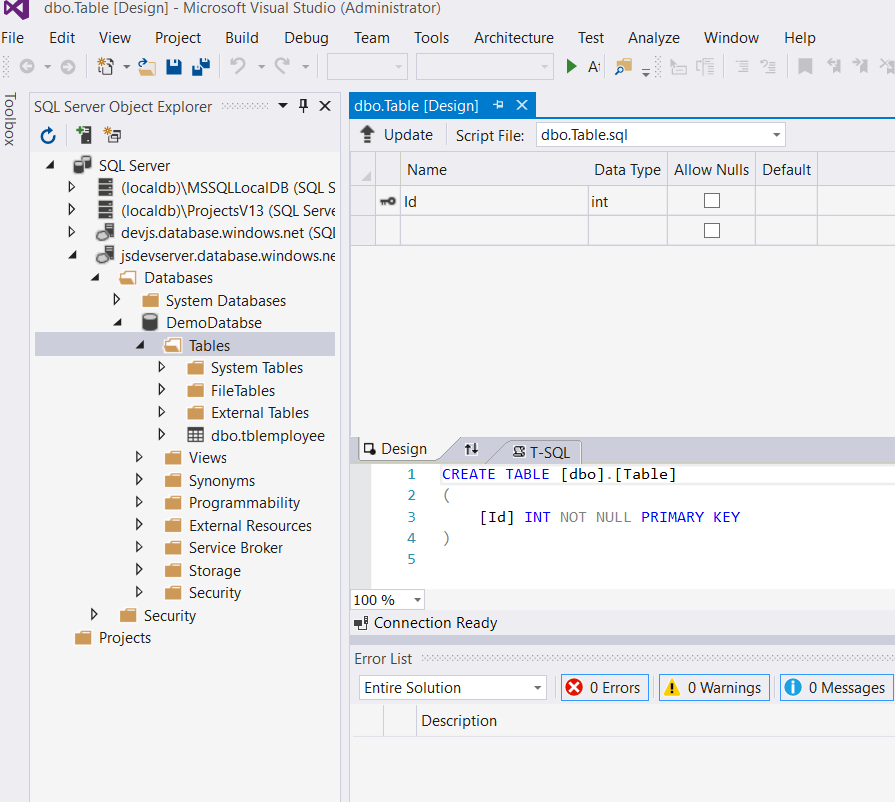
Connect Azure Database and Server Via Visual Studio IDE

Visual studio is a developer environment. Server Explorer will help us for accessing, configuring, managing the database like insert, update, delete. I have shown below steps for how to connect azure database to Visual studio server explorer.
The Windows Start Page, type Visual Studio and the program will appear. Click the program to open Visual Studio. You might want to right-click the program and pin it to the Start Page. Alternately from the Run dialog box, type devenv.exe and then click OK.
Step 1: VS Server Explorer:
Open Visual Studio > Click on “ View “ Menu > Select “SQL Server object explorer” > Select “SQL Server” and right click > Select Add SQL Server

Step 2: Connect Azure:
Provide your azure server details and login details in the Connect screen

Step 3: Azure Database access in Visual Studio:
After successfully login, select your database > right click Create, Edit, delete the table